Copy
How to Install an Aftermarket Car Stereo: A Complete Guide
Introduction
Installing an aftermarket car stereo might seem intimidating, but understanding the process helps you decide whether to DIY or hire professionals. Whether you’re upgrading to one of the best car stereos for 2026 or replacing a failing factory unit, this guide walks you through everything involved in aftermarket car stereo installation.
At Decibel Mods in Lehi, Utah, we’ve installed thousands of car stereos across every vehicle type imaginable. While we always recommend professional installation for optimal results, we believe in educating our customers about the process. Let’s explore what’s involved in installing an aftermarket car stereo system. learn more – https://decibelmods.com/about-us/
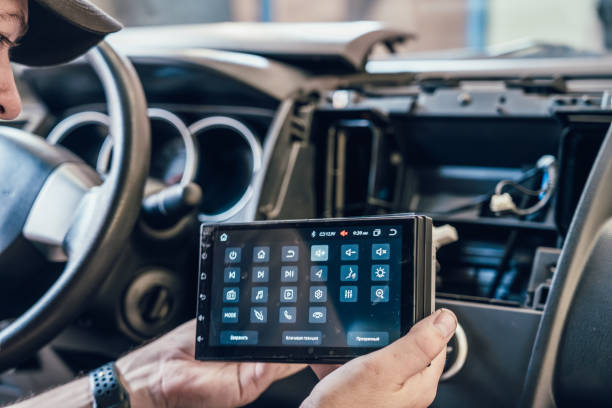
“aftermarket car stereo installation”
Tools and Materials You’ll Need
Before starting any aftermarket car stereo installation, gather the essential tools and materials. You’ll need a panel removal tool set to safely remove dash panels without scratching or breaking clips. Wire strippers and crimpers are necessary for making clean electrical connections. Electrical tape or heat shrink tubing insulates connections, while zip ties secure loose wiring.
Most importantly, you’ll need a vehicle-specific wiring harness adapter and dash kit. These components ensure your new stereo integrates cleanly with your vehicle’s existing systems without cutting factory wires. Never attempt installation without these crucial adapters—they protect your vehicle’s warranty and make future stereo changes simple.
Optional but helpful tools include a multimeter for testing connections, a flashlight or headlamp for visibility, and a socket set for accessing mounting hardware. Having the right tools transforms installation from frustrating to straightforward.
Step-by-Step Installation Process
1. Disconnect the Battery
Safety always comes first in aftermarket car stereo installation. Disconnect your vehicle’s negative battery cable before touching any wiring. This prevents electrical shorts, protects sensitive electronics, and keeps you safe from shocks. Wait at least 5 minutes after disconnection before proceeding—this allows airbag systems to fully discharge.
2. Remove the Factory Stereo
Carefully remove trim panels surrounding your factory stereo using panel removal tools. Work slowly to avoid breaking plastic clips that hold panels in place. Most stereos secure with screws or spring clips accessed after removing trim. Take photos during disassembly to remember how everything fits together.
Once you access the factory stereo, disconnect the wiring harnesses and antenna cable. Label connections if you’re uncertain about their positions. Keep all factory components—you might need them if you sell your vehicle or return it to stock configuration later.
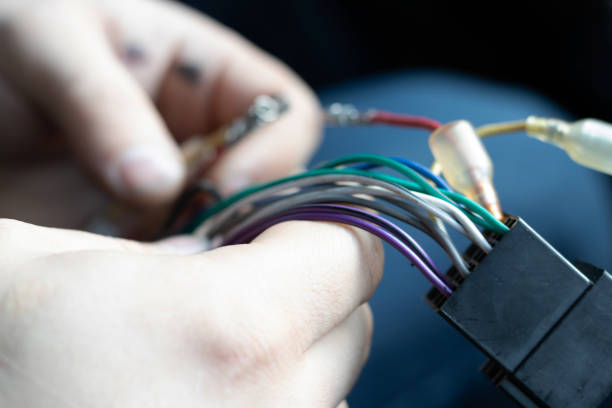
“aftermarket car stereo wiring”
3. Prepare the Wiring Harness
Connect your vehicle-specific wiring harness adapter to the new stereo’s harness. Match wire colors according to the wiring diagram included with your adapter. Most harnesses use standard color coding: yellow for constant power, red for accessory power, black for ground, blue for power antenna, and blue with white stripe for amplifier remote turn-on.
Solder connections or use quality crimp connectors—never twist wires together and tape them. Poor connections cause intermittent failures, reduced sound quality, and potential fire hazards. Heat shrink tubing provides the most professional, reliable insulation for each connection.
4. Install the Dash Kit and Mounting Bracket
Insert your vehicle-specific dash kit into the dash opening. These kits fill gaps between your aftermarket stereo and the factory opening, creating a clean, finished appearance. Secure the mounting bracket to your new stereo using the provided screws—hand-tighten only, as overtightening can strip plastic threads.
5. Connect and Test Before Final Assembly
Before securing everything permanently, connect your prepared wiring harness to the vehicle’s factory harness and antenna cable. Temporarily reconnect the battery and power on your new stereo. Test all functions: radio reception, USB connectivity, Bluetooth pairing, and smartphone integration. Adjust volume to verify all speakers work correctly.
If everything functions properly, disconnect the battery again before final installation. If you encounter problems, troubleshooting now saves time later.
6. Secure the Stereo and Reassemble Trim
Carefully slide your new aftermarket car stereo into the dash kit, guiding wiring through the opening. Secure the mounting bracket with factory screws. Organize loose wiring behind the stereo using zip ties—avoid pinching wires against sharp metal edges.
Reinstall trim panels in reverse order of removal. Press firmly on clips until they snap into place. Reconnect the battery and test all functions one final time. Program radio presets, pair your phone, and adjust audio settings to your preferences.
“car stereo installation completed”
Common Installation Challenges and Solutions
Even experienced DIYers encounter challenges during aftermarket car stereo installation. Some vehicles require steering wheel control adapters to maintain factory button functionality. These interfaces translate factory controls to work with aftermarket stereos, but programming them can be tricky without experience.
Backup camera integration presents another common challenge. Your new stereo needs proper camera input connections and trigger wires to display the camera feed when shifting into reverse. Professional installers have specialized knowledge about camera compatibility and calibration.
Modern vehicles with complex factory integration systems pose the biggest installation challenges. Some cars use CANbus communication systems where multiple components share data through a single network. Incorrectly interfacing with these systems can cause dashboard warning lights, loss of vehicle functions, or even computer malfunctions.
When to Choose Professional Installation
While DIY installation saves money, professional installation offers significant advantages. Complex vehicles with factory amplified systems, multiple speaker zones, or advanced integration features require specialized knowledge and equipment. At Decibel Mods, our technicians train specifically on these systems and have access to manufacturer-specific installation information.
Professional installation also includes proper audio tuning. We optimize your new best car stereo for your specific vehicle’s acoustics, adjusting EQ settings, time alignment, and crossover points for optimal sound quality. This expertise transforms good sound into exceptional sound.
Installation warranties provide additional peace of mind. If problems arise from our installation work, we fix them at no cost. DIY installation offers no such protection—mistakes can damage expensive equipment or your vehicle’s electrical system.
Integrating Amplifiers and Subwoofers
Many drivers upgrade to an aftermarket car stereo as the foundation for a complete audio system. If you plan to add amplifiers or subwoofers later, proper installation now simplifies future expansion.
Run amplifier power wire during your stereo installation to save time later. Route thick power cable from your battery, through the firewall, to your amplifier location. Install an appropriate fuse holder near the battery to protect your system. Use your stereo’s preamp outputs to send clean audio signals to amplifiers.
Subwoofer integration requires proper signal routing and often a dedicated amplifier. Your aftermarket car stereo should have a subwoofer preamp output with level control and crossover settings. These features let you blend your subwoofer seamlessly with full-range speakers for balanced bass response, if wanting better audio.
Get Started with Your Car Stereo Upgrade Today
Understanding aftermarket car stereo installation helps you make informed decisions about DIY versus professional installation. While basic installations might suit experienced hands-on enthusiasts, most drivers benefit from professional expertise, especially with modern vehicles and advanced audio systems.
At Decibel Mods in Lehi, Utah, we offer free consultations to discuss your installation needs and provide accurate quotes. Whether you’re installing one of the top car stereo brands or upgrading your entire audio system, our certified technicians ensure flawless installation and optimal performance.
Ready to upgrade your car audio? Contact Decibel Mods today to schedule your aftermarket car stereo installation. Experience the difference that professional installation and expert tuning make in your daily drive. Visit us at https://decibelmods.com/book-today/